Over time my washing machine has been developing a fault. I thought I had spilled water down the back of it because when I switched it on, every light on the front panel would flash continuously. Sometimes it would stop, and others it would just keep going and going.
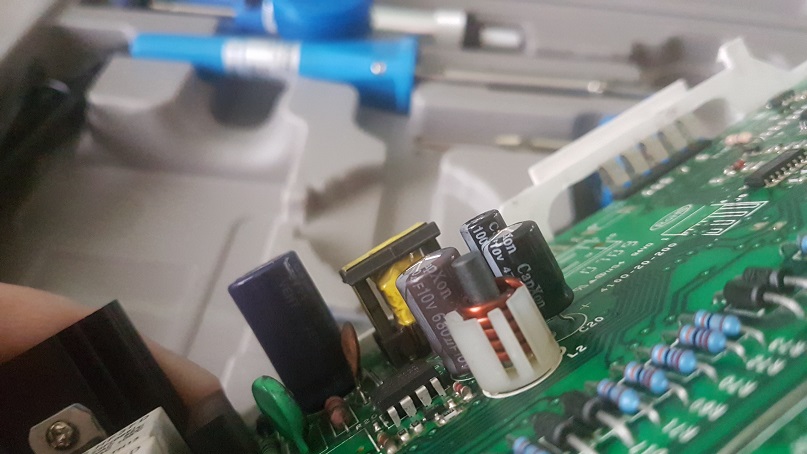
This causes an issue when I’m trying to do my washing up, did some research because I got sick of it and discovered it’s actually a really common fault with washing machines (usually by Hotpoint / Creda / Ariston). The main capacitor on the electronics board (usually C17 Capacitor) has failed.
To fix the issue it’s a case of replacing the capacitors. Reading horror stories on the internet suggests calling out a washing machine engineer, they would simply replace the board and reprogram it. Costing the end user around £150
The article that follows shows how I fixed my washing machine for £15
COMPONENTS NEEDED
- Solder Wick (2.8mm x 1.5m)
- Soldering Iron, Tip Cleaner & Solder
- Replacement Capacitor(s) – They need to be ELECTROLYTIC
- You will need to double check, but most likely it will be…
- 25V / 100uF
- 10V / 680uF
- 10v / 470uF
- You will need to double check, but most likely it will be…
Once you have verified the correct capacitors for your board you will need to remove them from the board. I’m not the best at soldering, so everyone has their own technique, not to mention the soldering iron I had was a really cheap one that didn’t heat up well. This is the technique I used
- Cleaned the tip of the iron after heating
- Apply a small amount of solder to the iron
- Put the solder wick over the board around the capacitor leg and wick it up
- Keep repeating the procedure until the leg is free, clean iron each time
It’s hard to describe the wicking process, but basically having the extra solder on the iron seems to increase the heat and make it easier to wick the hold solder off. Don’t bother with those plunger removers, they’re just annoying. Use the reel and it will be all off really quickly. In terms of cleaning the tip I used one of those metallic pan scrubbers you get from Asda (the balls of metal) what you use for cleaning stainless steel. The true kits use brass balls, but for cheap soldering irons I don’t really care. It worked well
Once you have removed the solder from all the pins, remove the capacitors. Insert the replacement capacitors inside the holes you made which should be clean, making sure you align (+ to +) and (- to -). You should find that there is a small white circle for the negative side and a + mark on the board for positive. Also on the capacitor the negative side there will be lines down the side. If there are no lines, the “shorter” leg of the capacitor is the negative side
After you have inserted a capacitor, tip the board upside down. Clean the tip of the iron, and let the end hit up (to the point where solder melts on touch), clean the tip again so it’s shiny. Then hold the hot point of the iron to the metal leg of the capacitor and touch the solder onto it, you should find the solder melts. Apply a small amount of solder so it covers the peg and then remove the solder, then remove the iron (this entire process should only take 2 or 3 seconds).

Clean the iron tip each time, and reapply solder to all the board points. Once you have resoldered all the connectors onto the board, snip off the end metal pieces with scissors / pliers. Your work should then be complete
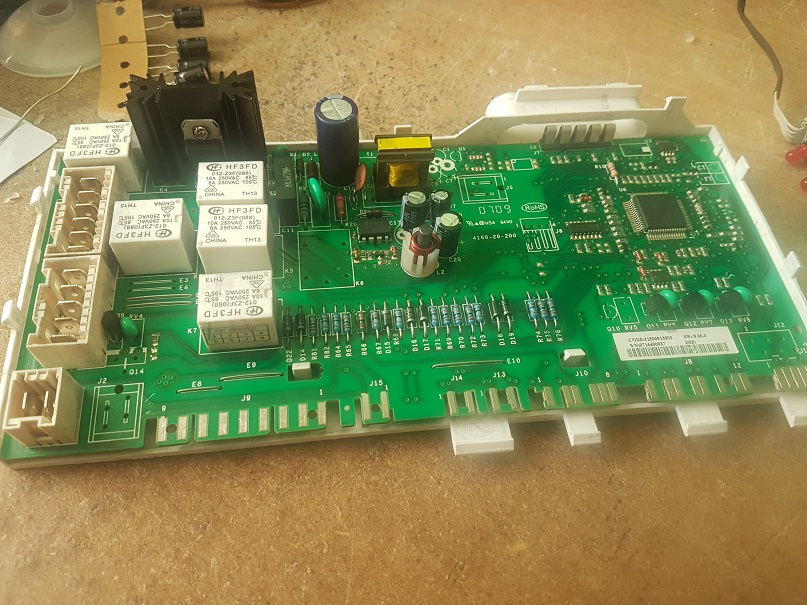
Now you just need to test the board, personally, I was paranoid of doing anything during first install so I hooked up all of the cables into the board and switched on the machine without the water connected so I had acccess to switch off the power if there was any problems.

The washing machine switched on straight away with no flashing lights. Plumbed in the hose after switching it off again and set away two loads. It is now repaired and this is how I fixed my washing machine for £15