Disclaimer: This page contains affiliate links. Predominantly as an an eBay Partner Affiliate, Google Adsense and Amazon Affililate and as a member of other affiliate networks. If you choose to make a purchase after clicking a link, I earn from qualifying purchases and may receive a commission at no additional cost to you.
Repairing the hanging glovebox in my car
This has been bugging me for a while now. It’s a common problem which seems to affect a lot of Audi, and I have it myself. The glovebox hinge snaps, not sure if it’s because it’s tight. weak, old or just poorly designed. The glovebox also droops down on the left hand side, so I’m not sure if it’s the hinge system ends up causing this problem and it fails over time. Either way it’s annoying and I wanted it fixed. So I didn’t have to use masking tape to hold it up anymore and rather than use a Glovebox repair kit for an Audi, I’d try something different instead. Plastic soldering the glovebox to repair it.
Tools to remove Audi A3 Glovebox
You will need the following tools to remove the Glovebox in the Audi A3. As you can see, you only need the most basic of tools and it should take no longer than 10 mins to remove. Dismantling it can take a bit longer depending how awkward it is, I’ve listed these tools in a seperate section underneath
- 1/4″ Ratchet
- 1/4″ Ratchet extension
- 8mm Socket

Original article : https://www.andrewhope.co.uk/Blog/glovebox-hinge-repair-on-my-audi-a3-sportback. Courtesy of https://www.andrewhope.co.uk
Tools you may want to consider using
- Thin Blade Pry/Screwdriver
- Pliers (needlenose ideally)
- Drill and 5mm bit
- Dremel
- Hot melt Glue gun
- Plastic soldering irons
I decided to purchase some plastic soldering irons because I plan on using them for another repair entirely on my car bumper / underbody guard on the car, because the connectors have snapped off that retain it. So I’m going to fabricate some new ones onto the car for remounting with. So figured I may aswell try it. I didn’t want to purchase one of the common repair kits from eBay, or on Amazon for the car. I wanted to go through the approach of plastic welding the Glovebox as a repair these are the irons I now have for additive soldering.
- 60W plastic soldering iron (Paddle Type) – Available on eBay or Amazon
- 100w plastic soldering iron (with 4 different tips) – I purchased on eBay, but you can also find them on Amazon
- 70w plastic hot staple gun – Another one you can find on eBay, or choose to buy via Amazon if preferred
How I removed and repaired my Audi A3 Glovebox
A side view of the glovebox when it was broken. You can see the blue tape that I used for holding it in place. There’s still a weird issue with the gloveboxes, they always seem to droop on the left hand side too; I think this is to do with the dampener they don’t properly seem to click in place and you have to manually do this. This was the damage that happened to the glovebox. One day it just snapped, I think if there’s any kind of tension or pressure the weakest link always goes. Unfortuately it always seems to be the same hinge. You can see how far it was hanging down below once opened.


I had to remove the 3 upper secrews that secure the glovebox to the dashboard. These are acessed from under neath the glovebox looking up towards the windscreen. There are 3 x 8mm bolts holding it in place. In hindsight I think either doing these 3 screws, or the central one last this is a good order to remove them, as this allows you to support the glovebox upon removal


I removed the two lower screws underneath the glovebox in the footwell. Another couple of 8mm screws, one either side at the bottom

To remove the side cover that covers the screw for the Glovebox on the trim side, you need to pop off the cover. There’s only about 3 spring clips that hold it into position so it will pull off quite easily. Pop your finger in the spot noted below and pull outwards. It’s held in by little clips. If you need it, the part number is 8P0857085


Once the cover is removed, you will get access to the screws that hold in the glovebox and mount it to the dash.In order to remove the Glovebox, you also need to remove the retaining screw that holds it in place


To remove the glovebox aswell, you also need to remove an 8mm screw that holds in the Glovebox centrally. It’s located next to the interior glovebox light. I used the extension to get to this

If you put the glovebox down in the footwell of the car, it allows you to assess everything what needs to be removed or disconnected. It’s a bit easier to visualise this when you can look at it from a distance. After removing the glovebox, I also needed to disconnect the electrical connections which prevent you from removing it from the car. This connection is easy, there’s only one cable holding it in place which you can see when you move the glove box. This is removed by squeezing the two connectors as noted, and pulling the connector out.


After you have removed the glovebox you will be able to access the rear. You shouldn’t need to access anything like this at the rear like the fan, or the Airbag unit, but just gives a bit of visibility and understand. You can also see the pollen filter housing from here. You don’t need to remove the glovebox to change the pollen filter, but I’ve wrote a guide if needed on changing a pollen filter in an Audi A3. This is a picture for a little understanding on what’s behind the glovebox


The glovebox removed, as you can see one side no longer holds up

If you do end up needing a new glovebox as yours is too badly damaged, or feel you can’t do this job. Then the part number you will need to look up will be 8P2857035


I disconnected the electrical plug from the dampener to reduce any damage to wiring. Just if needed this is the part number 8P0971679, it’s used as the wiring loom for the Glovebox and also the CD Changer.

Using a pair of needle nose pliers, I got a firm grip on the pin that holds in the hinge, and the glovebox dampener. Simply tugging the clip will seperate them. There’s a small gap at the edge it’s literally just a pin that splits with pressure. The design works fine. Grab one side, pull out and put it back in to replace it. It’s basically just a friction design.


I removed the Glovebox dampener after removing the pin which secures the hinge to it. As a note, this dampener also acts as the contact switch for the Glovebox light. This is the part number for the Glovebox Dampener (and contact switch). The part number is 8E2880324


The contacts for the Glovebox dampener / glovebox switch. I’m assuming this is how it’s meant to look and not actually damaged. As the interior light for the glovebox comes on when needed and goes off when needed.


To remove the hinge on the drivers side of the glovebox is really easy. Basically I just put a pair of needle nose pliers inside the gap for the glovebox hinge and then keep prising it outwards.


The hinge pin for the drivers side of the hinge, it came out without a problem whatsoever. Due to the access, it was also easy to remove.

After removing the drivers side dowel pin, I popped off the cap which covers the pin for the hinge for the passenger side which is broken

The cap up close. It’s actually keyed so that it’s only meant to fit one way by the looks of it. This is the lcoation of the cap, if you look closesly you can see the little line at the edge where the keyed section goes down for the cap.


I don’t know how tight this was mounted, but it refused to move like the other one. The drivers side hinge pin moved really easy. This one had a vulture like grip. It wasn’t coming out without a fight. It just wouldn’t budge, in the end I used a dremel to cut away the plastic surrounding the pin to remove it. You can see the amount of material that I had to remove in order to remove the pin. This is where it benefits people to use the Glovebox repair kits on eBay. If you can tolerate using a bracket, it’s a lot easier to repair, as it’s basically just four screws that you need to put into the glovebox hinges.


After I removed the pin I planned on smoothing it down prior to refitting. This thing was in tight and just wouldn’t budge, it’s surprising how much grip this little thing did. Even after removing parts of the glovebox and hinge underneath with pliers it still took some fighting before it would come out. I even tried drilling it to see if I could get a stud extractor on it


You won’t be able to full remove the lower part of the glovebox when you’ve removed the two pins on it. What will happen is that they will catch on the stops when trying to turn it in the normal direction. It’s easy to remove though, basically just slide the glovebox out of the two holes where the hinges reach through. It’s easier to work out when doing it than typing it here, just rotate it and pull it through the gap.

This is the damage to the glovebox side where the hinge broke away from. As you can see it was right at the hinge point, prety poor design, as this is quite common and the reason why so many repair kits are sold on sites like eBay. They always break in the same spots. The benefit of using the repair kit is that it screws onto the factory hinges and into the plastic of the glovebox. I personally don’t like the look, but again it’s better than a broken glovebox, and cheaper than buying a new one.


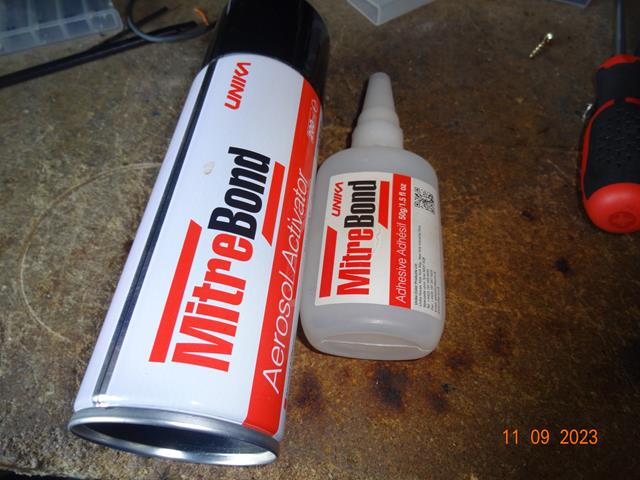
In order to create a temporary connection before I carried out work. I decided to use some Superglue with an Activator. I opted to use Mitrebond kit. It’s really good, has a strong bond strength, and seems to last way longer than normal Superglue. Basically I put some glue on, held the broken hinge in place. Then did a quick blast of the activator spray and held it. Hard within seconds
I secured the hinge that was broken back onto it’s original spot. I put some superglue on the hinge, and then positioned it into place. After I found the position I needed I sprayed some activator on to harden it as I held it. You can see the white marks from the activator here.


Now that I had the hinge secured with superglued. I ground down the carpet around the hinge with my dremel at the outside edge to bring it to plastic, then used the plastic soldering iron and melted the ABS plastic all the way underneath the hinge, and against the edges of it to secure it in place.


The rear of the hinge after I soldered it. It doesn’t look neat because I used a grinder to take it back towards the plastic so there wasn’t as much in the way plus I’m an amateur with this kind of stuff. I also didn’t use the proper tip for it (there’s a triangle shaped one) this has a flat surface and gives a smoother look. I just used a soldering iron style tip. It can be neatened up however and covered with spray paint. The next plastic section that I soldered onto the hinge. I tried to create a strong join at every edge. I wiggled it a bit, and it seemed solid. If these repairs fail, I have stronger methods of repairing using either a mesh, or hot metal staples to physically hold he plastic together. The method I used was the most basic version as it was the simplest and fastest to do


After I finished with the iron, I let it cool down. I went through about 1/2 a stick of the ABS plastic replacement. As I wanted to create a firm join. Only thing I’d recommend when doing this, is do it in a well ventilated area, or wear a mask. ABS is not nice to inhale.This was actually the tool that I decided to use. The plastic soldering iron with 4 heads. The triangular tip would probably have been better for smoother edges, but I’m still learning as I do this. The actual iron though feels really good quality, the one I purchased had a UK Plug and two adjustable power levels. It feels really good quality unlike some other soldering irons that I’ve used previously it feels well built


After I had repaired the hinge on the glovebox, I wanted to repair some of the damage that I did with the grinder at the hinge side. I ended up covering this part in tape so it become square, then just filled it with hot plastic again and let it harden. I then drilled a hole thorugh it once hardened using a 5mm bit. If you don’t have a plastic soldering iron, you could use something like superglue mixed with sawdust. Or just woodglue. Then drill a hole through it. Again I don’t really care about what this looks like as you can’t see it without removing the glovebox. It’s strong and functional, that’s what is most important.


I had some spare grease from the doing the caliper carrier bolts on my brakes, so I decided to use this for greasing up the pins that hold the hinges on the glove box. The grease that I used was Granville Ceramic Brake Grease. Although any generic grease should work, since it’s a miniscule amount needed for the pins. I’m not actually sure if this helps or not, but the pins themselves are basically smooth metal rubbing against plastic. I noticed when manipulating the hinges to remove the pin that the passenger side where mine broke was slow to move (and moved quicker later). It’s possible that when it gets hot it expands, but who knows? I figured for the price of the grease, and it wouldn’t do any harm, it’s a rotating part so I wanted to make sure it’s lubricated well. A small amount of grease on the finger tip and coated just the pin part (not the knurled section) to lubricate the hinge as it rolls on it.


After reinserting the pins for the hinges. I reattached the dampener and then reattached the hinges. I found the easiest way to do this was push the pin trhough the dampener first until it clicks on the inside, then just realign the hinge stalk and push it all the way through

This is the glovebox repaired, as you can see it now holds in position well, and doesn’t have any issues. Maybe I’ll tidy up the repaired plastic at a later date with a metal fire, and spray over some black paint, or carpeted spray so it looks more natural on the cover up. Regardless, I’d much rather have something like this, than a piece of blue tape holding the glovebox closed. It gets really annoying when it keeps dropping down. The glovebox drops slower than I remember, buts this may actually be the way it works I may have to adjust something. Either way I’m happy with the end result.

The glovebox when fitted to the car, you can see what the hinge looks like repaired. I ground it down a bit with a dremel grinder, although I don’t like the look of it, it’s a lot nicer than blue tape holding it in place and knowing it secures properly. If I want to tidy it up later I can file it down and use some black spray paint / false carpet. I’m fine with this because it’s functional, and the broken hinge was annoying me more than how it looks. Refitting is just a reversal of the removal process. Remember to connect up all electrical connections prior to assembly.

Mistakes that I made when removing my Audi A3 glovebox
Another learning lesson for me, I tried prising apart. This wasn’t a smart idea. Not recommeded, this was me being dumb. I was going to try the repair another way by seperating the two halves of the glovebox (or what I thought were halves) so that I could probably bond the hinge to the plastic.
You can’t do this, the popping noises I heard when dismantling was actually me breaking the plastic inside. So DO NOT TRY THIS!
Oops, you live you learn. This is why I post these artcieles, so that I can make the mistakes and others can learn from them.

