Decided to make myself a DIY budget solder fume extractor. I like working with Electronics and Tech, so I tend to harvest a lot of supplies. In total this little project cos me around £5 to make. The only items I really needed to purchase were the DC Power Jack, and the 3L Really Useful Box. The rest of the items I harvested
Disclaimer: This page contains affiliate links. Predominantly as an an eBay Partner Affiliate, Google Adsense and Amazon Affililate and as a member of other affiliate networks. If you choose to make a purchase after clicking a link, I earn from qualifying purchases and may receive a commission at no additional cost to you.
Why make one not buy one?
I do eventually plan on buying one, (I’m looking at a “Multicomp” brand) although at the moment I’m saving up for a different tool. I’ll be buying a Quick 861DE Hot-Air Station so wanted to save some pennies in the mean time. Didn’t fancy buying a cheapo Hakko fume extactor clone from eBay or Amazon when they’re basically just a 12V DC Fan with a Carbon Filter on them. I had the parts, so thought why not just make one for a little bit of fun
If I wanted to make a commerical one I’d buy an Axial fan or something similar that’s powered by 230v rather than 12v. My 12V fans only output around 30cfm or Air (around 57 m3 per hour), whereas a commercial one can do about 150cfm+ (245 m3 per hour) of extraction.
Plus it was something fun to do whilst I’m pottering around with things. I’d rather avoid any potential fumes inhaled in the mean time
Does it work?
Yes, but not ideally, this is more of a stop gap project that I wanted to do cheaply since I had most of the materials at hand, and just wanted to experiment. The solder extractor works, however I don’t feel it has a high enough flow rate. I’m using 2 – fans next to each other to increase the flow rate. Although I might need to experiment with the configuration (maybe use a push/pull setup) to maximise the flow rate. It helps to extract the fumes, but I feel it could be better. The whole purpose of this was to build something as cheap as possible.
Components that I used to build the fume extractor
The items I used to build this solder fume extractor were as follows
- 3L Box (Really Useful Box) brand
- 80MM Computer Fans (12V 0.17A) – They’re around 35cfm each
- HEPA Vacuum Filter Bag (Henry Hoover)
- Wires, Crimps, Screws, Drills – Usual tools
- DC Power Jack 2.1mm
- DC Power Switch DPST On-Off Type (Double Pole Single Throw “On-Off” Type)
- Netgear Router Adapter, AC-DC (12V 1.2A Output) (Part number PWR-002-008 or similar)
Building the solder fume extractor

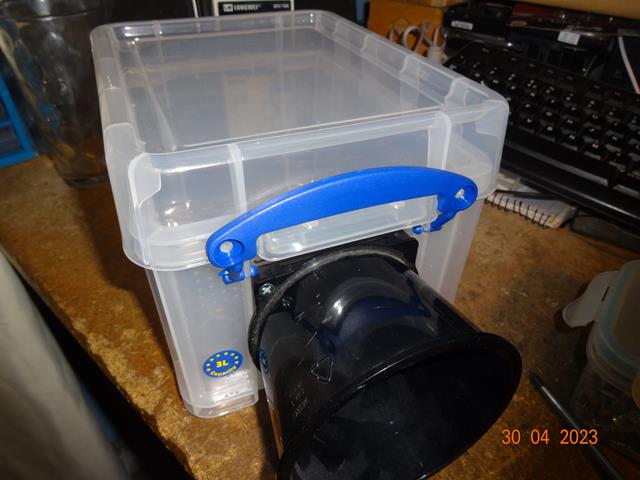

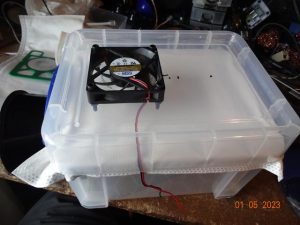
Our “victim”, a 3Litre “Really useful box”. Indeed it is. I chose this from Asda, because it was cheap. Had solid locking catches, allowing me to secure it, and a place to fit inside a filter and some fans. I like these boxes for storage, so figured I’d use it for something else


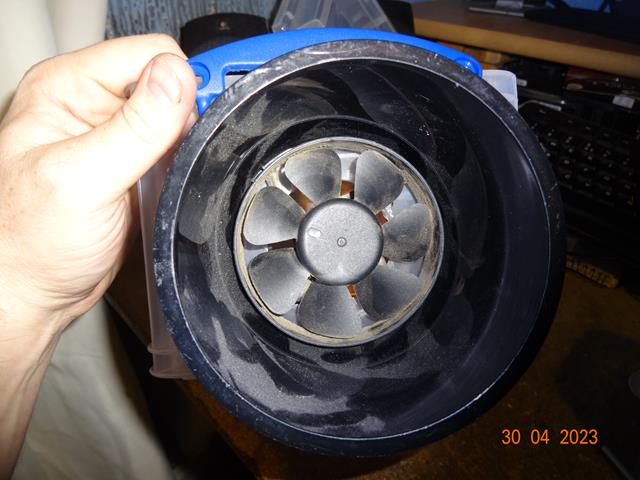

This is the inlet fan on my solder fume extractor housing. Basically I had a leftover 80mm CPU fan and shroud (it’s an LGA775) shroud that was given to me. Figured I’d make use of it, acts as a duct. I just needed a source of all to pull it all in. I might try swapping the fan around so it’s blowing into the box rather than sucking to see if it improves the draw rate of the solder fumes.


Wiring up the DPST On-Off switch. Cut out a hole in the box big enough for the switch, and pushed it into the box to lock it in place. I don’t prefer having a device that powers up as soon as power is applied. I personally like the control of the power with an On/Off button to act as that point of isolation
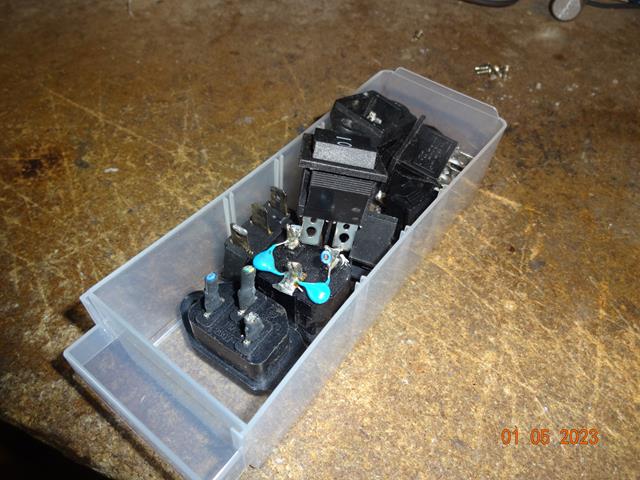
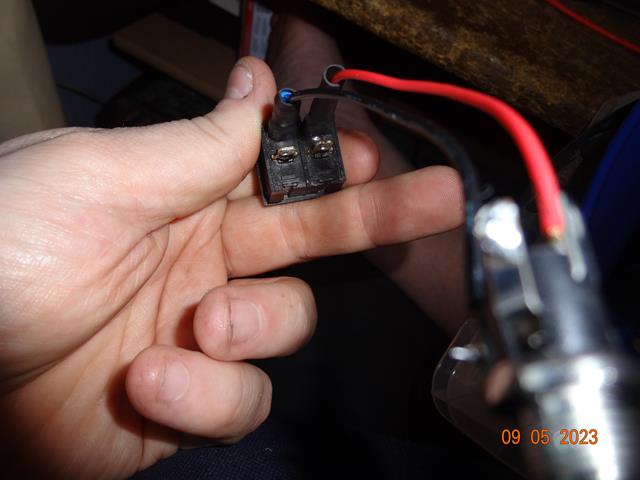

Making up the power switch. As you can see, working with Electronics, I tend to harvest parts I find useful. Open up the box of spares, and plenty of On/Off switches available I can use. I powered these with a DC Jack, and wired the DCJack to the input of the switch, then added heatshrink to protect the switch on my fume extractor to avoid any electrical shocks. Just as a note, the picture in the middle is the correct wiring. The far right one is wrong. It should be Posi/Neg top rown, and Posi/Neg bottom row. NOT posi/posi and neg/neg as pictured in the last one. I had to troubleshoot it because I misunderstood the way I wired it why it wasn’t working properly. The switch is setup in the following way:
DC Jack (Power Input) –> Output Wires top row of switch –> Output wires (bottom row of switch) power the fans
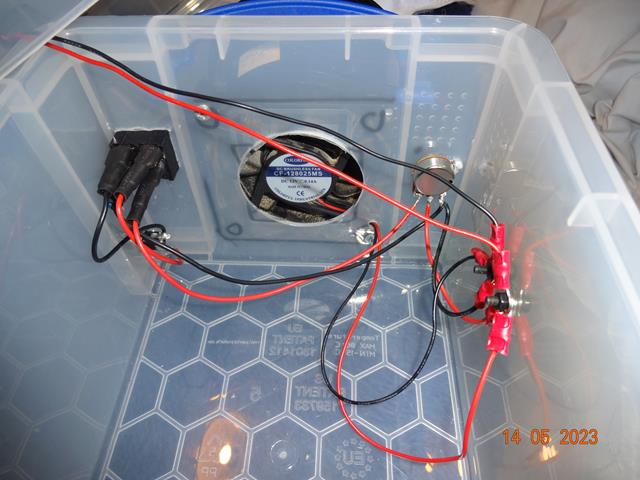

The fan, and switch wiring internals. You can see underneath the switch is the DC jack in the fume extractor. It powers the switch, from there the switch is connected to some screws which basically power all of the fans. I did use a potentionmeter iniially because I wanted to control the speed based on voltage, but that idea didn’t work. Too much resistance on the pot. You learn through experimentation after all. Now it’s just hard wired onto the fans to power them all full speed.


An exhaust fan applied to the lid, with a HEPA filter below it. There’s different methods of filtering, as each kind of filter applies different things in a fume extractor. You get a Carbon Filter for the fumes, a HEPA filter for large particles and dust, and other kinds. Depending on how many stages you want on your fume extractor. Me. I don’t care, I just want to filter the air. The HEPA filter is a bag from a “Henry Hoover”. I have about 20-30 of them spare currently I bought in bulk for cleaning. So cut one open and just put it over inside the box to filter stuff. Does it work, Who knows?


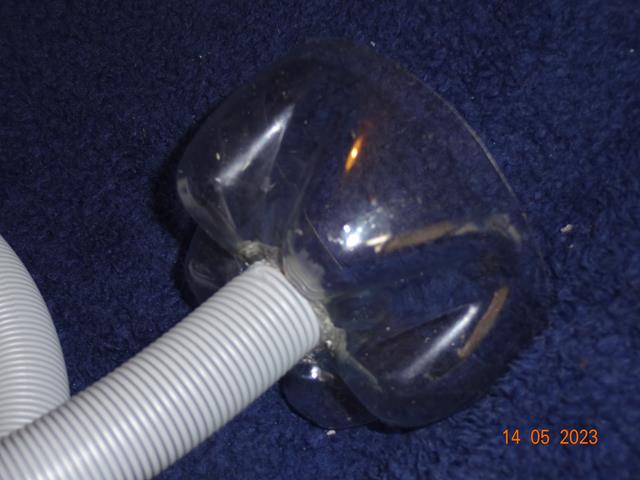

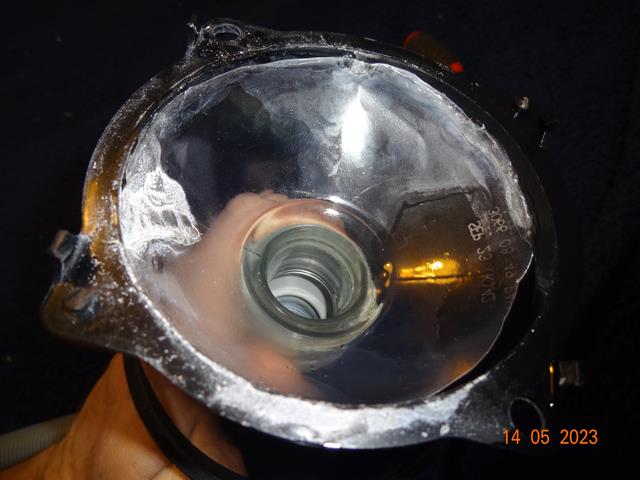

No expenses spared here, I went all out for the budget build. Powered by a pop bottle for the inlet vents and solder collector vent, and a washing machine feed hose. I cut off the ends of the bottle. Susprisingly the cap end was the perfect size to fit into the hose. I then added superglue to the extractor pipe, and solidified it quickly with some activator. Did the same to the other end after drilling a hose for my solder collector cup. The activator creates a reaction of heat (thermo… something) so melts the plastic slightly as it cures. Don’t really care, it’s chep and free.


Decided to test the solder fume extraction, bit hard to see in these photos but it does work. I’ll be playing with the angle of the pipe, since it’s probably better being above it slightly with my current config to catch it all. It works though.