How good are you at wiring Dupont connectors with SN-28B crimpers?
Wiring Dupont connectors with SN-28B crimpers is something of a technique you have to learn. Unless you fancy forking out for the genuine Dupont terminals, and Dupont crimpers. It’s normally a case of buying some eBay specials.
Disclaimer: This page contains affiliate links. Predominantly as an an eBay Partner Affiliate, Google Adsense and Amazon Affililate and as a member of other affiliate networks. If you choose to make a purchase after clicking a link, I earn from qualifying purchases and may receive a commission at no additional cost to you.
The problem however is that they’re very fidgety to use, and difficult to get a good crimp, with terminals coming apart. Not being joined correctly, or not attaching to the connector properly. I wrote this article, and created a Youtube video so that others can see how I found out my method of wiring up Dupont connectors with SN-28B crimping tools.
Youtube video for wiring dupont terminals with an SN-28B crimper

This is the technique I use to wire up my connnectors
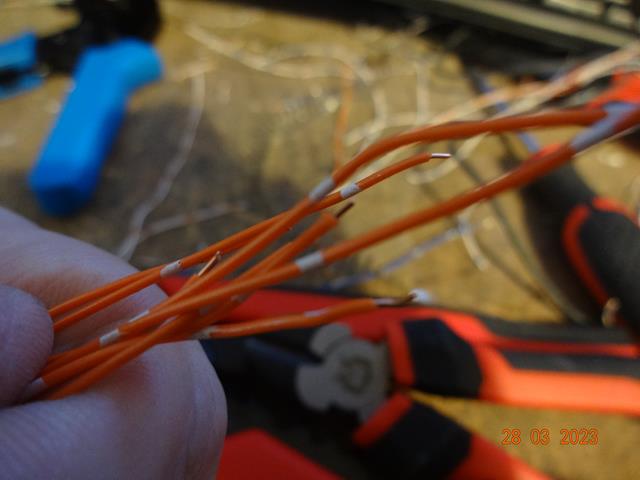
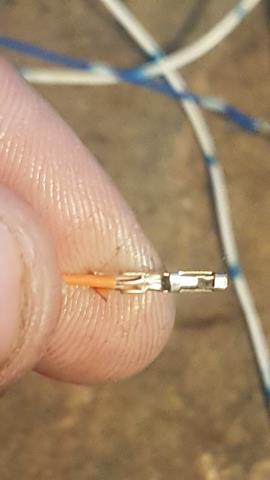
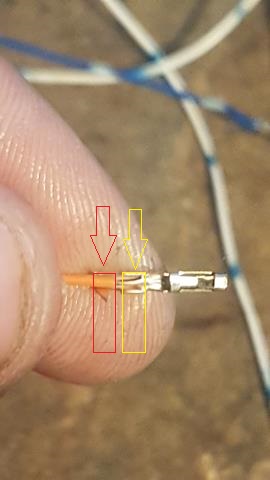
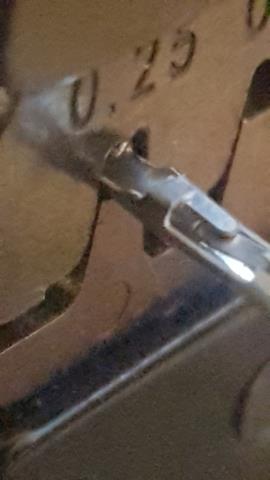
- Strip about 2mm of insulation from your wire to be crimped, if you’re unsure you can measure it with the actual connector, about the width of the dupont connetor should be enough, you only need for the wire to be long enough to go to the edge of the metal tab. It’s a bit hard to make out in the first picture, so to clarify the copper “inner” core of the wire that needs to be stripped, should fit inside/end where the box is with the yellow border in the picture. The insulation goes in the crimps in the red box. Measuring with the width of the connector should be enough

- Remove the Dupont crimp from the terminal strip by flexing it back and forth

- Attach it with insulation prongs facing down into the SN-28B crimpers


- Slide the terminal until the prongs lock into their position in the crimpers (about half way)


- Turn the crimpers upside down and insert the wire

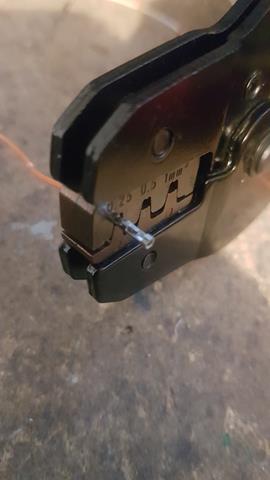
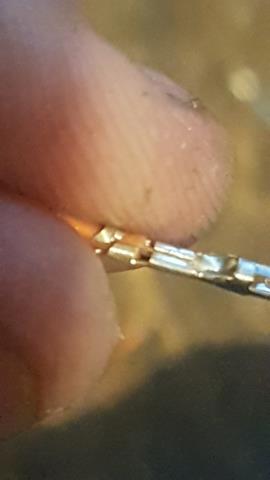
- Align the copper material with the edge of the crimp, if your wire / core is visible like the last pic you’ve come out too far, the metal wire you align with the edge of the crimp and barely be visible


- Crimp down to squeeze the wire around the terminals

- Remove the crimp, and recrimp towards the edge to bend the prongs around the insulation

- Insert the terminal into the housing with the crimped bits facing up over, you should feel/hear it “click” twice when inserting. The locking tabs will be facing up over


It took me around 15 mins to crimp 8 terminals from scratch. I’m using them to make connections onto my weather station board for my project. As I want it tidy and simplified.

AFFILIATE LINK
- You can find a set of these crimps and connectors on Amazon